


Fight or Flight is a very intense 4-player local game where each round unfolds at a frantic pace. Prepare to engage in combat against up to three friends in the hilarious and mind-blowing game where quick reflexes and good balance are the keys to victory. When a match starts, each treasure seeker has to remember one thing. Everything is a threat.
Roles: Game Designer and Level Designer.
Responsibilities:
-
Hiring the production team.
-
Designing the game concept.
-
Creating and analyzing game mechanics and features.
-
Collaborating with artists to achieve the appropriate visual style.
-
Working closely with programmers to improve the overall game feel.
-
Designing the audio features of the game.
-
Adjusting the game balance.
-
Designing levels.
Enemies Design
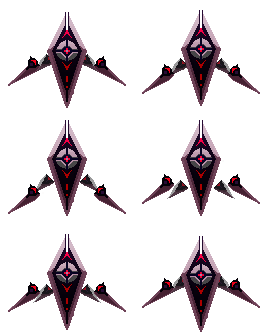
Ancient protector_1 and Ancient protector_2 attack players with a homing missile as soon as they get into their attack range. It follows players within five seconds. Just because the missile is slower than players, players can use it to their advantage. For example, with the proper skill, the player can hit others with it. If the homing missile doesn't hit anyone within 5 seconds, it blows up. Keep in mind the explosion has a pretty big range. The only difference between Ancient protector_1 and Ancient protector_2 is the first hovers in the air when the second is attached to a platform.
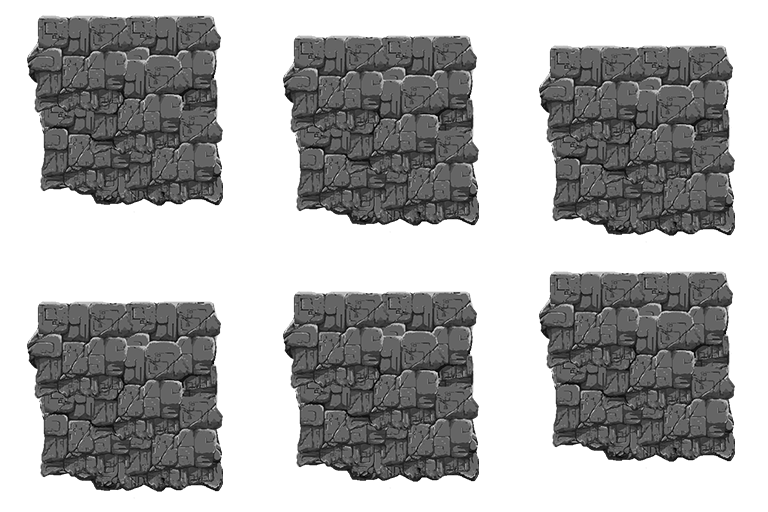
Regular, moving and spinning platforms come in different sizes and shapes. They also do constant damage when players touch them. Regular platforms stay on the same position the entire match. Moving platforms move back and forward diagonally, horizontally or vertically. If players appear between a solid surface and the moving platform, they get killed instantly. Spinning platforms spin around the center point in a clockwise or anticlockwise direction randomly. They can change the course at any time during the match.
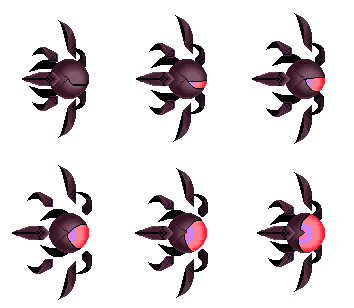
Eyes of Collectors have the biggest attack range in the game, and they shoot red projectiles which considered as deadliest projectiles in the game because of their high velocity. This enemy as Russian roulette. You never know what to expect, but you know something is coming.
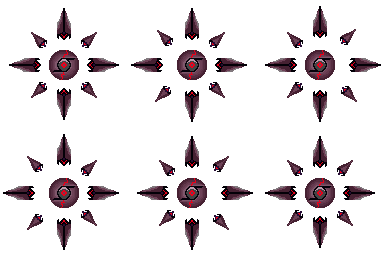
Wrecking-Ball comes in two types. Wrecking-Ball_1 rotates around the center point in a clockwise or anticlockwise direction randomly. As the spinning platform, it can change the course at any time. Wrecking-Ball_2 moves back and forward diagonally, horizontally or vertically with a different velocity.
Jumper moves between platforms and changes the velocity of every single jump. This feature makes it very unpredictable and hard to dodge. Pay attention to its glowing eye; It's a jump indicator.

All listed enemies can be stunned or destroyed by players, except platforms. If the player shoots enemies with appropriate projectiles [Orange, Red or Yellow], they explode. Keep in mind the explosion can hit other players.
Level Design
Level 1: The Cave.
Mode: The Deathmatch.
This level introduces four enemies, namely moving and regular platforms, the ancient protector_1, and wrecking-ball_1. The picture below gives more details about all objects on the level.


When the match starts, players appear on the level with no ammo. To get ammo, players have to collect pickups which contain desired projectiles. The picture below shows all positions of pickups on the level.
The game has two types of pickups: Blue and Red. Red diamonds contain yellow and red projectiles. These projectiles are only projectiles that can kill other players and destroy enemies. Blue pickups contain blue and green projectiles. Their purpose is to stun players and enemies. Based on their position players understand that it is way harder to get red diamonds then blue. Red diamonds are located in hard attained zones and near enemies when blue diamonds are fairly easy to get. Also, players see that the number of projectiles is limited. This mechanic forces players to take a risk and get as many projectiles as possible. For the purpose of a breakdown, this level has been divided into 3 sections.


The level is symmetrical. Section 1 and Section 3 are the same. These two sections contain the biggest number of enemies. Therefore, players mostly fight in Section 2. Not to mention Section 2 has a big area for maneuvers and clear access to other sections. Keep in mind projectiles don’t spawn at the same time. If players want to control the space, they have to move around.
When moving platforms leave the level, they open a bigger area for maneuvers. L-shaped platforms in section 1 and 3 visually separate the level into 3 sections. Players can use both L-shaped and face-shaped platforms as the cover.

Level 2: The Temple.
Mode: The Deathmatch.
This level contains three types of enemies, namely spinning and regular platforms and ancient protector_2, and couple interactive objects which are portals. The picture below gives more details about all objects on this level.


This level was designed to push players into the action from the start. Two spinning platforms take the majority of space. Moreover, they have two ancient protector_2 attached to them. Because of that players are forced to carefully and constantly change their positions. For the purpose of a breakdown, this level has been divided into 2 sections.
When platforms reach the top and bottom of the screen, it seems like players stuck in left and right sides of the level. If players want to get from one section to another, they should use a gap between spinning platforms or portals. The picture below shows all positions of pickups on the level.


The majority of pickups are located in the center of the level. It forces players to use the gap way more often than portals. If players want to control the space around, they need to stay in the center area. It is a risky place where players have to balance in a small tunnel that spins. Additionally, there is no room for maneuvers and escapes. However, it is the only place where players have access to red pickups which increase their chances to win the match. The risk is rewarded.
Level 3: The Cold Trap.
Mode: The Pursuit.

The level contains all types of enemies that this game has so far. Also, it includes a significant number of moving and spinning platforms that either can crush or block the pass for players if they don't pay attention. The picture below gives more details about moving and rotating objects on the level.

In the Pursuit mode, the game gives roles to players. One player gets the role of the runner when others become hunters. The runner spawns with a camera attached to him. Wherever he goes, the camera follows him. Hunters should not touch the screen borders. If they do that, they get killed. When hunters die, they spawn near the player with the camera after few seconds. Players have individual timers which count the time down when the camera attached to them. When the timer hits zero, the player with the camera wins. To take the camera from the runner, the hunter has to kill him. Also, if the runner dies accidentally, the camera randomly goes to the closest hunter. For the purpose of a breakdown, this level has been divided into 11 sections.
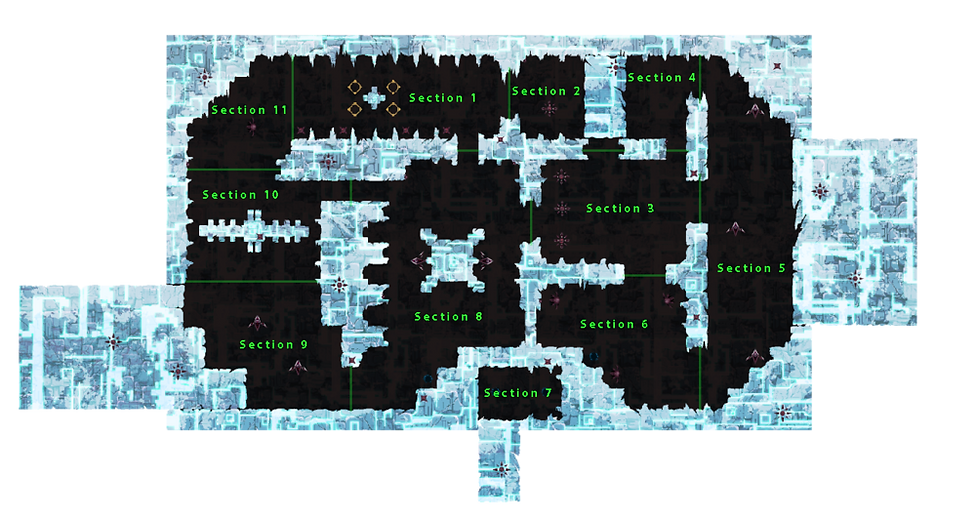
Players appear in the first section. The camera randomly attaches to one of the players. The objective of the runner is to keep the camera when the objective of others is to take it from him and become the runner. The runner needs to remember one thing - this level is his weapon. It was designed to give the player with a camera a chance to run the match in his scenario. All sections have multiple exits so that the runner always has a chance to successfully escape or even set a trap.
Section 8 is a center area. Also, it is the biggest area on this level, and it has the most significant amount of entrance from other parts of the map. Sections 1, 3 and 6 should be famous among skillful players. They are the most dangerous sections. There isn't much space for maneuvers, and enemies do a lot of damage. Sections 2, 4, 5, 7, 9 and 10 will be used by runners to set traps. With perfect timing and flying skills, the player with a camera should be able to block passes for hunters by stunning spinning and moving platforms. Section 11 has only one enemy, but it's enough to challenge players.
To win in this mode, players have to develop both shooting and flying skills. The image below shows all positions of pickups on the level.

Players always have access to blue projectiles, especially the runner. Most of the blue pickups are located at intersections so that the runner easily can pick it up. He needs it to stun hunters, enemies, and platforms. The runner can win some time by stunning hunters. On the other hand, if he decides to stun the enemy or platform, he can block the pass for hunters or clear the pass for himself. Red projectiles are often in hard attained zones and near enemies. They mostly need for hunters because it's the most proven and reliable method to take the camera from the runner.